How U.S. Citizens Can Move to Mexico (Temporary Residency Step-By-Step Guide)
The Most Accessible Way For Americans To Get Legal Residency.
Mexico offers one of the most accessible residency paths for U.S. citizens.
The most common route is economic solvency. You prove you can support yourself financially through income, savings, property ownership, or capital investment. The application process is straightforward, and you don’t need to be retired or wealthy to qualify.
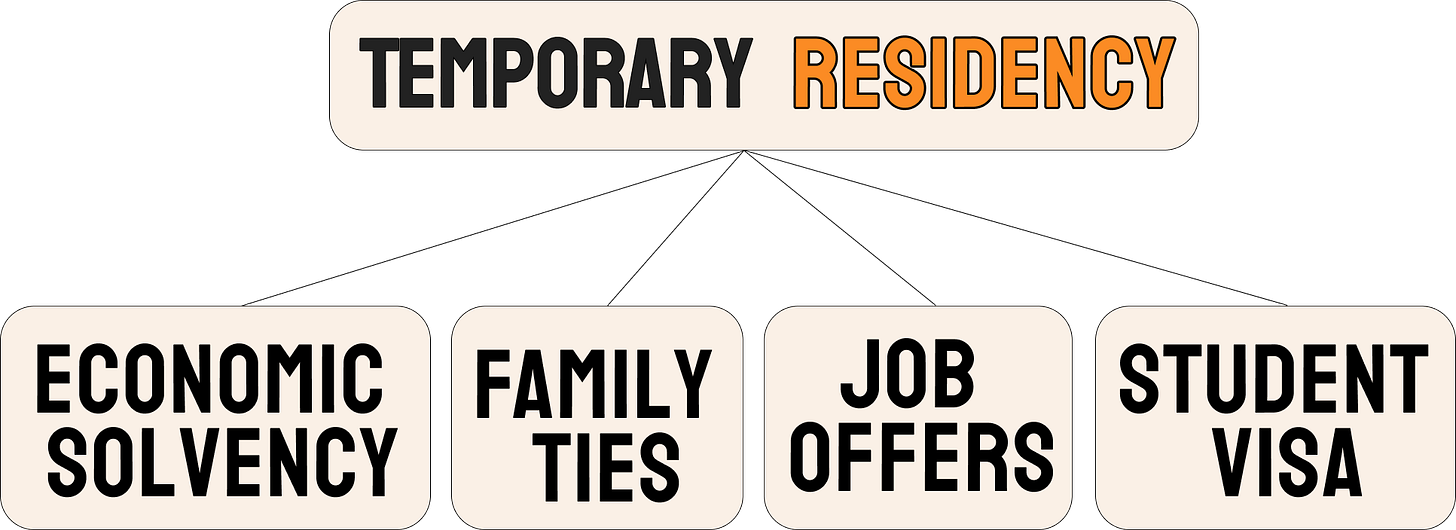
Other pathways that exist are family ties, job offers and student visas. But economic solvency is what most Americans use.
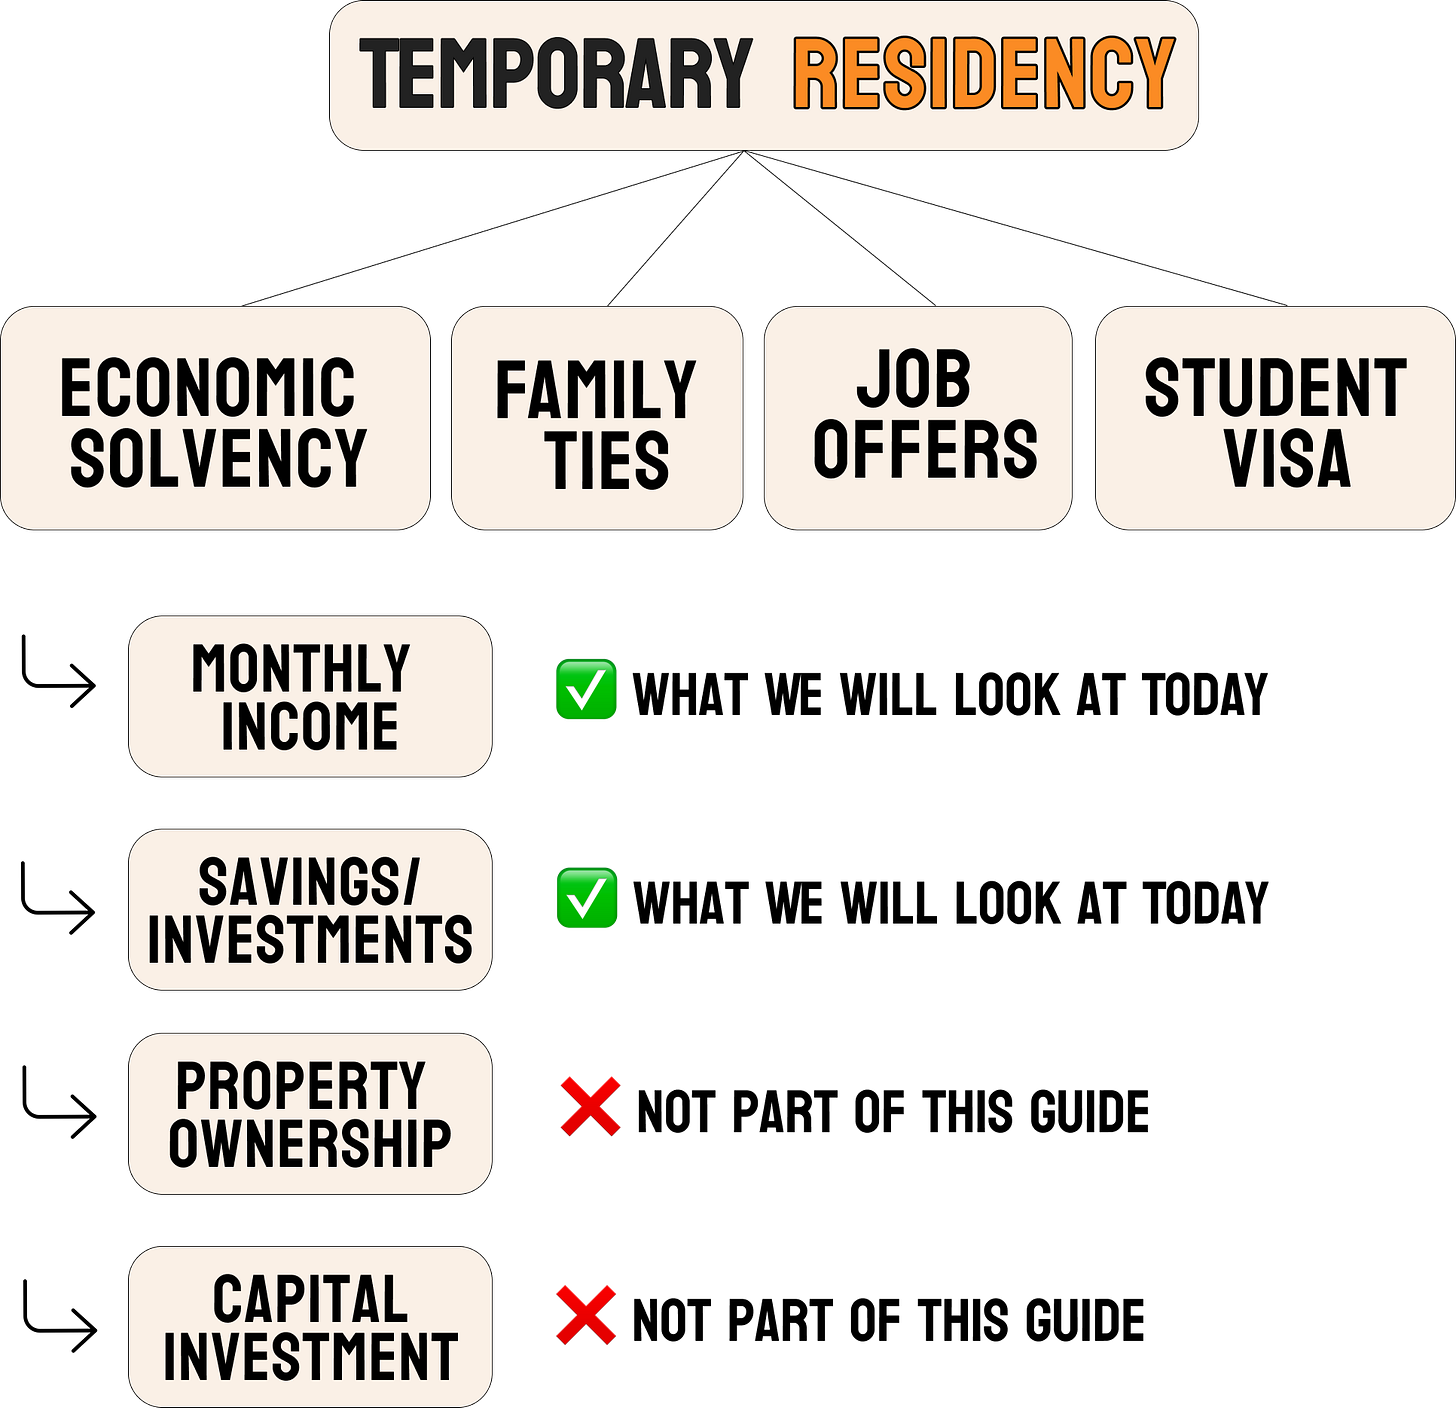
This guide focuses on the economic solvency pathway through income or savings.
We’ll briefly mention the other routes, but the deep dive covers what will matter for most people, which is proving you can support yourself financially.
Unlike my previous deep-dives on Canada, Ireland and the UK, this one includes the complete application process from start to finish. Comment below if you would like this format for another country.
This deep-dive will cover the following parts:
Why economic solvency is the primary pathway for U.S. citizens
Exact income and savings requirements that qualify you
Step-by-step application process from consulate to residency card
Common mistakes that delay or endanger applications
What happens after approval and how to maintain your status
Downloadable Mexico Residency PDF Checklist (print it + check off each step)
Let’s break it down.
#1 Why Economic Solvency Is The Primary Pathway
Most Americans who get Mexican residency use economic solvency.
Mexico recognizes four ways to prove economic solvency:
Monthly income (most common)
Savings or investments (second most common)
Property ownership in Mexico (requires ~$558,000 property value)
Capital investment in Mexican company (requires ~$279,000 investment)
Most people use options 1 or 2.
The property and investment routes exist but require significantly more money.
As mentioned above, other pathways to Mexican temporary residency include family ties (spouse, parent, or child who is a Mexican citizen or permanent resident), job offers (requires employer sponsorship and INM approval), and student visas (must be enrolled in a Mexican institution).
If you are an American with steady income or savings and no direct ties to Mexico, economic solvency is your route.
The financial requirements are clear. The process is standardized across consulates (with some variation, we will look at “Consulate Shopping” and “Consulate Variations” below).
You can qualify whether you are 25 or 65, retired or working remotely, employed or self-employed.
Takeaway: Economic solvency through income or savings is the most accessible path for the majority of U.S. citizens seeking Mexican residency.
Now, let’s look at what temporary residency actually gets you.
#2 Understanding Temporary Residency vs. Other Options
Mexican residency comes in two forms: temporary and permanent.
Temporary residency allows you to live in Mexico for up to four years. Your first card is valid for one year. You renew it annually (or for multi-year periods) at an immigration office in Mexico. After four consecutive years, you can apply for permanent residency.
Permanent residency allows you to live in Mexico indefinitely. The card never expires (though minors under 18 must renew annually). You can apply for permanent residency directly if you meet higher financial requirements and most consulates require you to be retired or drawing pension/social security.
Most Americans start with temporary residency because:
The financial requirements are lower ($4,100 monthly income vs. $7,100 for permanent)
You don’t need to prove retirement status
After four years, you can upgrade to permanent residency without reproof of economic solvency.
What It Gets You And What It Does Not
What temporary residency gets you:
Legal right to live in Mexico for the duration of your permit
Ability to enter and exit Mexico freely
Option to apply for work authorization (separate process)
Access to open Mexican bank accounts
Eligibility for Mexican driver’s license
Ability to import your foreign-plated vehicle temporarily
Path to permanent residency after four years
What temporary residency does NOT automatically include:
Work authorization (you must request this separately if needed)
Voting rights (only citizens can vote)
Guaranteed acceptance into public healthcare (IMSS enrollment has separate requirements)
Takeaway: Temporary residency is the most practical starting point for Americans who meet the income or savings requirements and want long-term legal status in Mexico.
If you’re interested in other countries, you might want to check out the guides to Canada, Ireland or the UK.
Now let’s look at the pathway most people use: income and savings.
#3 Financial Solvency Requirements (Income and Savings)
Economic solvency comes down to proving you can support yourself.
You do this through either monthly income or accumulated savings.
You choose one route. You can’t mix them.
Monthly Income Route
Most people use the income route. You show six months of bank statements with consistent deposits. The threshold is around $4,100 USD per month (after taxes). This number comes from Mexico’s Minimum Daily Wage multiplied by 300.
The exact dollar amount shifts with exchange rates, but Mexican consulates generally calculate using 20 pesos to one dollar.
Monthly Income Requirement
Formula: 300 x daily minimum wage
Total in USD: Approximately $4,100 USD per month
What qualifies as income?
Employment salary
Self-employment earnings
Pension payments
Rental income from properties you own
Investment dividends
Social security benefits
What does not count?
Cryptocurrency (too volatile)
Employee stock options
Loans
The income has to be net (after taxes). You need bank statements covering six consecutive months, though some consulates ask for 12. Each consulate interprets the rules slightly differently, which creates frustration but also opportunity. If one consulate rejects you, you can try another.
This is called “Consulate Shopping”.
Adding a spouse or partner increases the requirement by roughly $1,400 per month. Each minor child adds another $1,400. You prove these relationships with marriage certificates or birth certificates.
Savings Route
If you don’t meet the $4,100 monthly income threshold, the savings route becomes your option.
This requires approximately $70,000 USD sitting in bank accounts or investment funds. The balance needs to stay above this level for 12 consecutive months. Mexican immigration looks at your average monthly balance across the entire year.
Savings Requirement
Formula: 5,000 x daily minimum wage
Total in USD: Approximately $70,000 USD
Cash in checking or savings accounts always qualifies. Investment accounts like mutual funds or bonds usually qualify. IRAs and 401(k)s work at some consulates but not others. Pension accounts qualify if you are old enough to withdraw from them without penalty.
What does not qualify:
Cryptocurrency
Precious metals
Business assets
Employee stock options
Real estate value (unless you’re using the separate property ownership route)
The 12-month requirement means the balance must stay above $70,000 consistently throughout the entire 12-month period you are documenting. If you sell a house and deposit $100,000 today, you still need to provide 12 consecutive months of bank statements showing balances above the threshold.
The balance can’t dip below $70,000 at any point during those 12 months.
This means planning ahead if you are building up savings specifically for the residency application.
What About Joint Accounts?
Joint accounts create a complication (but not a serious one).
If both spouses apply together, one serves as the principal applicant (meeting the full threshold) and you add roughly $1,400 for the dependent spouse. This applies to both the income route ($4,100 + $1,400 = $5,500/month) and savings route ($70,000 + $1,400 = $71,400 total).
Also important: The financial statements must match the principal applicant’s name.
You might expect couples to need $140,000 in savings (double the individual requirement).
That’s not how it works. When applying together, you need $71,400 total (not $140,000).
The $1,400 addition for a dependent spouse is significantly less than proving full financial solvency for a second person.
What About “Consulate Variations”?
Earlier I mentioned, that there are some “variations” across consulates. What I mean by that means is, that some consulates might accept six months of income statements while others demand 12. Some might accept IRA accounts while others reject them. Even exchange rates applied might differ by a few percentage points.
The numbers in this guide are approximations based on current Minimum Daily Wage calculations and a 20-to-1 exchange rate.
Always verify exact requirements with your specific consulate before applying.
TL;DR: For most Americans, the decision comes down to this:
If you earn at least $4,100 monthly and can document it through bank deposits, use the income route.
If you have $70,000 or more sitting in accessible accounts for at least 12 months, use the savings route.
The key is consistency. Mexican immigration wants to see stable financial resources, not sudden windfalls or erratic balances.
Now let us look at the step-by-step process for getting the residency.
#4 Step-by-Step Application Process
The Mexico residency application happens in two distinct phases:
Consulate phase (outside Mexico)
Canje phase (inside Mexico).
Understanding both parts helps you plan timing, budget, and logistics.
Phase 1: The Consulate Application (Outside Mexico)
This is where your residency journey begins. You apply at a Mexican consulate in your home country, prove your financial solvency, and receive a visa sticker in your passport if approved.
Step 1: Choose Your Consulate
Most people apply at the consulate nearest to where they live. But you have options (remember the “Consulate Shopping” from earlier).
Not all consulates accept out-of-area applications, so contact them first.
Some consulates have months-long waitlists. Others book appointments weekly. Some impose stricter requirements or interpret rules differently. If your local consulate has no availability or higher financial thresholds, you can apply at a different consulate that accepts out-of-area applicants.
It’s allowed, though some consulates only serve residents of their specific jurisdiction. Check the consulate’s website or call to confirm they accept applications from your location.
Step 2: Book Your Appointment
Mexican consulates use different booking systems. Some use MiConsulado (the online portal). Some require email requests. A few still accept phone calls. Very few take walk-ins.
The MiConsulado system (formerly Mexitel) serves many consulates globally. You create an account, select your consulate, choose “Visa” as the appointment type, then select either “Residente Temporal” or “Residente Permanente.”
Upload your passport (PDF format, under 1MB), fill in contact information, and select an available date.
If your consulate doesn’t use MiConsulado, check their website for specific instructions. Most list appointment procedures under “Visas” or “Consular Services.”
Appointment availability varies dramatically. During peak season (October through March), some consulates book 2-3 months out. Off-season appointments might be available within weeks. If you miss your appointment, rescheduling can take months.
Step 3: Gather Your Documents
Requirements vary by consulate, but most ask for:
Valid passport (minimum 6 months validity remaining)
Completed visa application form (download from consulate website)
One passport-sized photo (white background, no glasses, no filters)
Proof of financial solvency (bank statements covering 6 or 12 months)
Marriage certificate if applying with spouse (original and copy)
Birth certificates if applying with minor children (original and copy)
Cash or card for visa fee ($54 USD for Americans, $80 CAD for Canadians, varies by country)
Some consulates require notarized or apostilled documents, especially if applying outside your home country. Check your specific consulate’s requirements list.
Please make sure to check this article for the most common documents you need when moving abroad:
For bank statements, most consulates want official statements printed on bank letterhead showing your name, account number, and monthly balances or deposits. Screenshots or online statements may not be accepted.
Some consulates require statements in English or Spanish. If yours are in another language, get them officially translated.
Also, check MiConsulado for recent info, whether you need certified copies from your bank.
Step 4: Attend Your Interview
The consulate interview typically lasts 15-20 minutes. An officer reviews your application, checks your documents, confirms your financial solvency, and asks about your plans in Mexico.
Common questions include:
Why do you want to move to Mexico?
Where will you live?
How will you support yourself?
Do you have family in Mexico?
How long do you plan to stay?
Answer honestly and simply.
The officer wants to verify you meet the requirements and understand what you are applying for. Bring originals of all documents plus copies. Some consulates make copies themselves, others require you to bring them.
The officer collects the visa fee at the interview. Most consulates prefer cash, though some accept cards. Confirm payment methods beforehand.
If approved, the officer places a visa sticker in your passport. This happens either immediately or within a few days to a few weeks, depending on the consulate.
The sticker is valid for 180 days from the issue date.
You must enter Mexico within this window.
If you are denied, ask why.
Common reasons include:
Insufficient funds
Missing documents
Inconsistent information (always make sure, that names on documents match exactly!)
Suspicion that you won’t actually live in Mexico
You can re-apply immediately at another consulate after fixing the issue. There is no mandatory waiting period.
Phase 2: The Canje Process (Inside Mexico)
Once you have the visa sticker in your passport, you must travel to Mexico and complete the second phase called “canje” (exchange). This is where you exchange your visa sticker for an actual residency card.
Step 5: Enter Mexico Within 180 Days
Your visa sticker shows an expiration date. Enter Mexico before that date. The visa is single-entry only. Once you enter, the sticker is canceled.
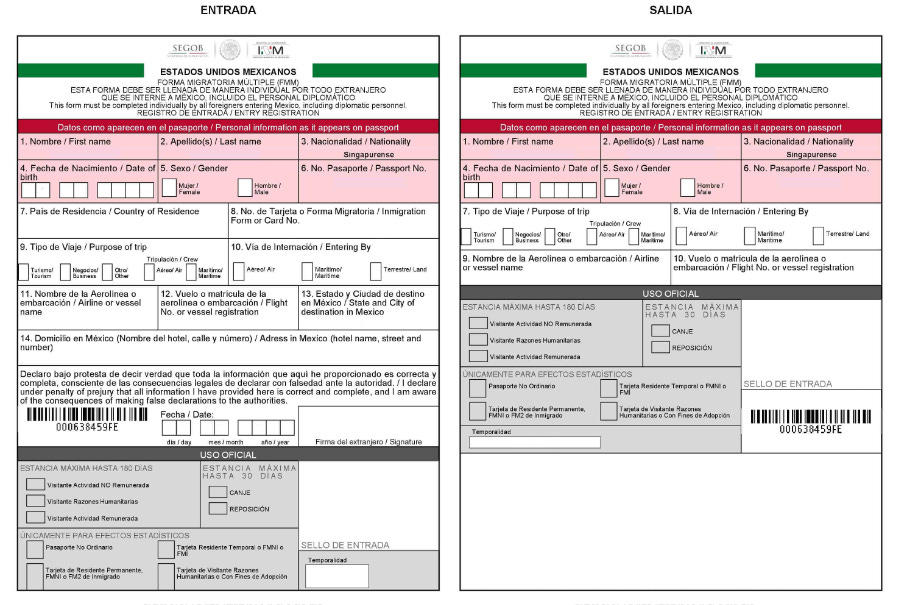
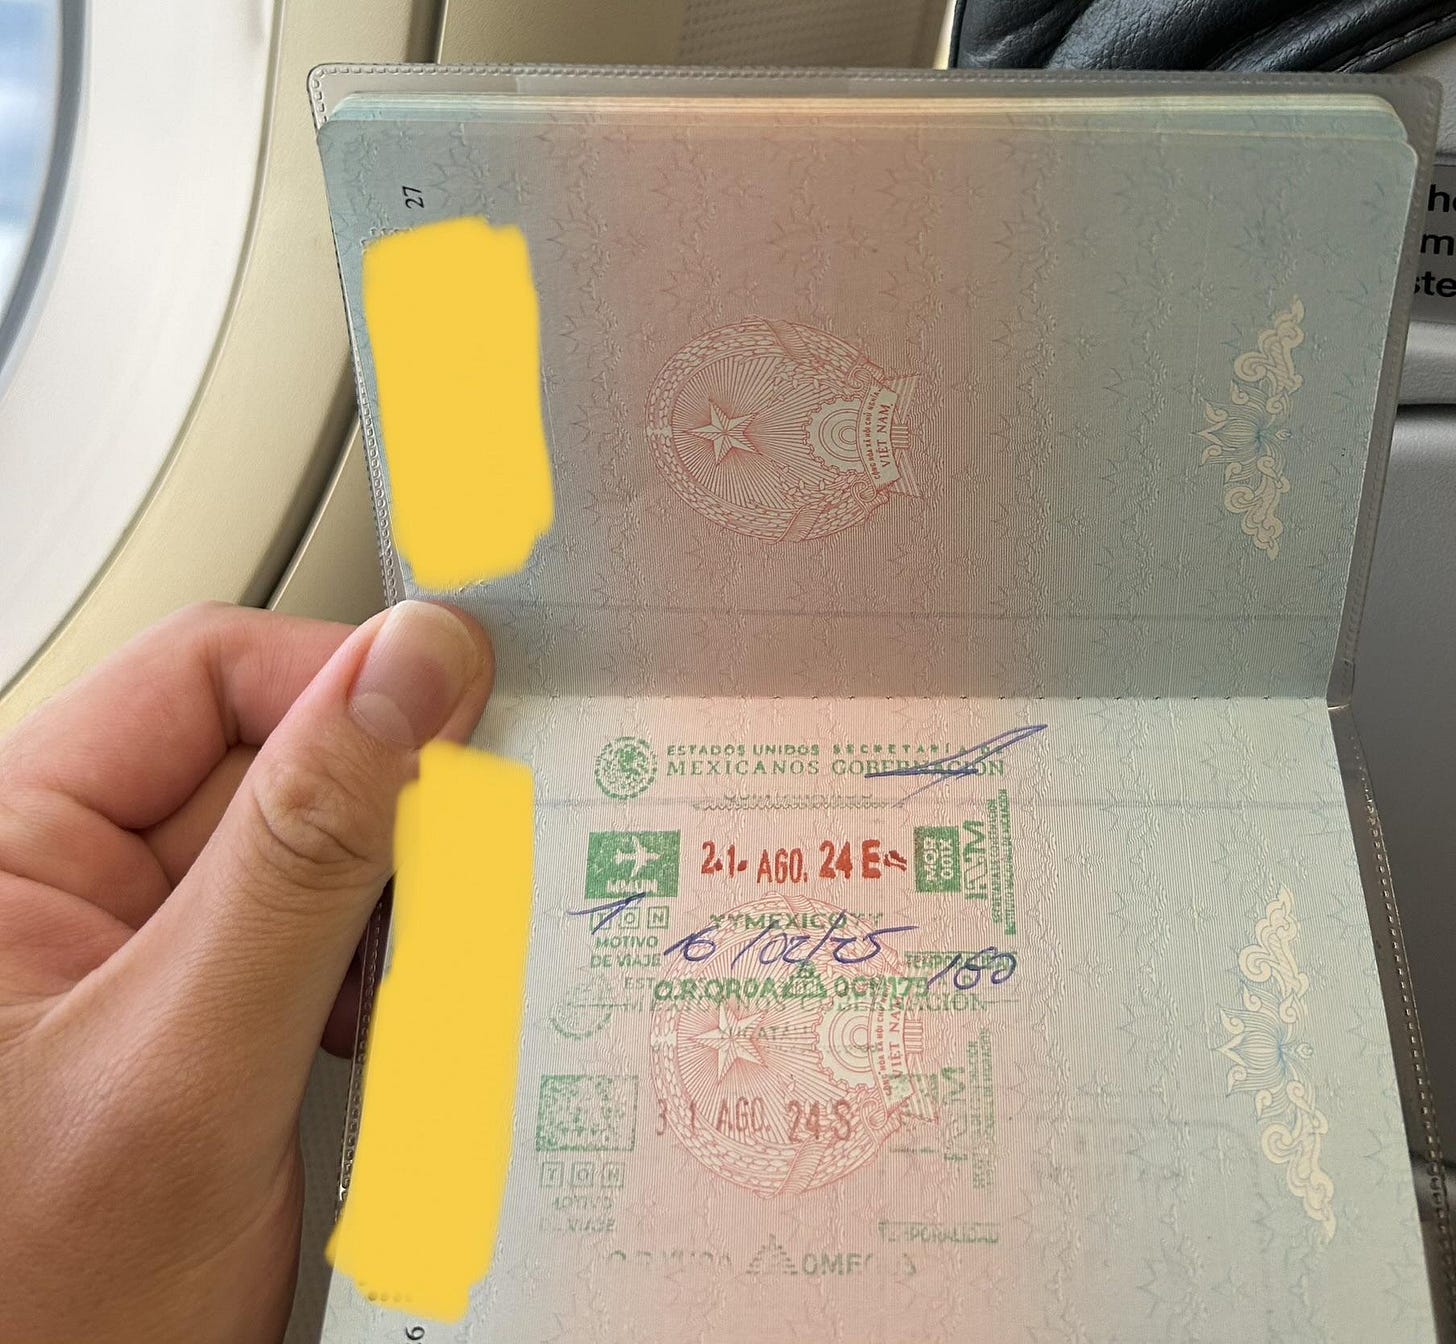
When you arrive at the airport or land border, you fill out an FMM (tourist form) but mark “other” as your purpose of visit.
Show your passport with the visa sticker to the immigration officer. They will stamp it and mark “canje” on your FMM, giving you 30 days to begin the residency card process.
If entering by land, go to the INM (Instituto Nacional de Migración) office at the border crossing.
Make sure they mark you as “canje” and not as a tourist.
If they mistakenly mark you as a tourist, your visa becomes invalid and you must restart the entire process (you would be surprised, but this happens).
Step 6: Book an INM Appointment
Within 30 days of entering Mexico, you must begin your canje process at an INM office. This means you need to either attend an appointment or at minimum have an appointment scheduled within those 30 days. The actual card production can take longer.
Most INM offices now require appointments booked through their online system. The online system opens appointments in batches. Some offices release slots at the start of each month. Others release them weekly. Appointment availability varies significantly by location.
Popular expat destinations (Playa del Carmen, Puerto Vallarta, San Miguel de Allende) often have 2-4 week wait times.
Smaller cities might have same-week availability.
As long as you book your appointment within 30 days of entry, you’re legally fine even if the appointment date itself is beyond 30 days.
If you can’t get an appointment within your 30-day window, some INM offices accept walk-ins for urgent cases. Arrive very early (6-7 AM) and explain your situation. They may issue a service token for that day. This isn’t guaranteed but sometimes works.
Step 7: Complete Your Canje Appointment
At your INM appointment, bring:
Your passport with the visa sticker
Your FMM marked as “canje”
Proof of address in Mexico (utility bill, rental contract, or letter from landlord)
Payment for residency card fee (approximately 5,000-6,000 MXN, varies by year and residency type)
Four passport-sized photos (some offices provide photo service on-site)
The INM officer processes your application, takes your fingerprints and signature, collects payment, and gives you a receipt. They keep your FMM. You walk out with a receipt showing when to return for your card.
Step 8: Collect Your Residency Card
Card production times vary. Most offices issue cards within 1-3 weeks. Some take longer. Your receipt shows the expected pickup date.
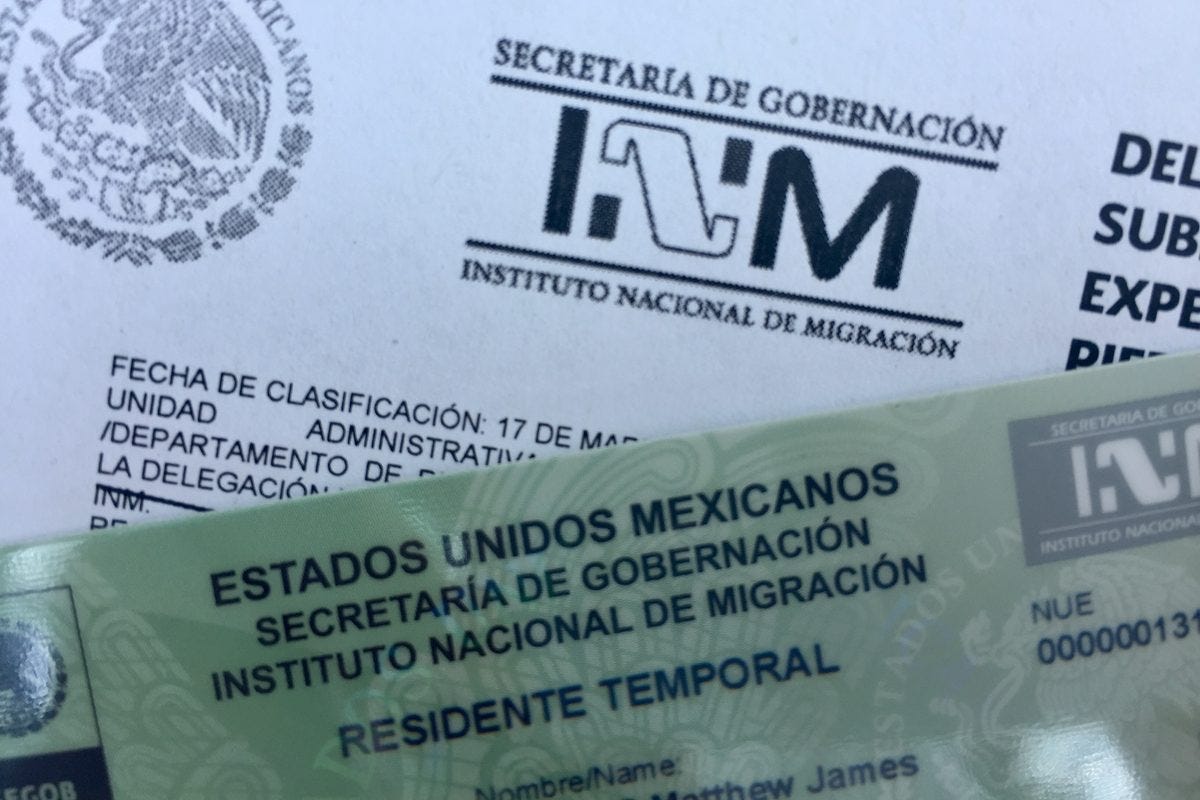
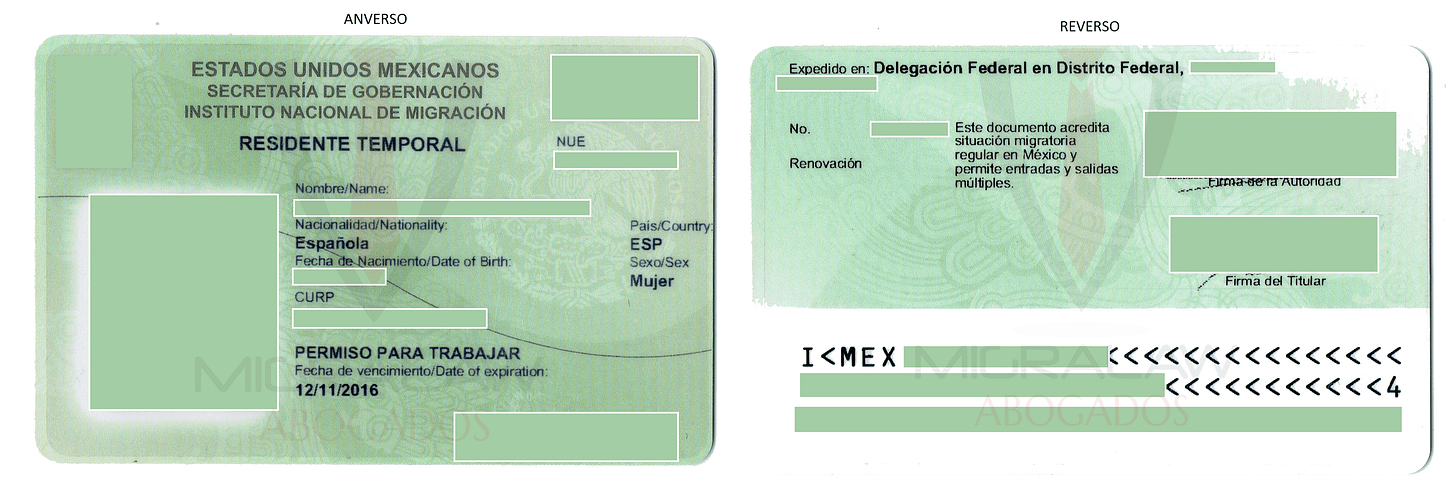
Return to the INM office on or after that date. They call your name, verify your identity, and hand you your residency card. This is your Temporary Resident Card (Tarjeta de Residente Temporal).
The card shows your name, photo, fingerprint, CURP number (Mexican tax ID), and expiration date. Keep this card with you at all times in Mexico. It serves as your legal status document.
Timeline Summary
Consulate appointment: Book 1-12 weeks in advance (varies by consulate and season)
Consulate processing: Immediate to 2 weeks for visa sticker
Entry to Mexico: Within 180 days of visa issuance
Begin canje process: Within 30 days of entry (appointment can be scheduled beyond 30 days)
Card production: 1-3 weeks after canje appointment
Total time from consulate application to card in hand: 2-8 weeks on average.
Costs Summary
Consulate visa fee: $54 USD (US), $80 CAD (Canada), varies by country
Residency card fee in Mexico: $250-300 USD
Optional: Translation services, apostille services, immigration facilitator ($200-600 USD)
Total (basic) cost: $300-400 USD
Takeaway: The process splits between your home country and Mexico. Plan for 2-3 months from start to finish, budget around $300-500, and prepare for bureaucratic variations at each step. The most critical deadline is starting your canje process within 30 days of entering Mexico.
#5 Common Mistakes That Delay or Derail Applications
Mexican residency applications fail or stall for predictable reasons.
Most mistakes happen because applicants misunderstand requirements, submit incomplete documentation, or miss critical deadlines.
Knowing these patterns helps you avoid them.
Mistake 1: Insufficient or Inconsistent Bank Statements
This is the most common reason for denial at the consulate.
Your bank statements must show consistent balances or deposits that meet or exceed the threshold for every single month in the period requested (6 or 12 months).
One dip below the minimum disqualifies you.
For the income route, consulates want to see regular deposits. If you’re self-employed and have irregular income, this creates problems. One month with $6,000 and the next with $2,500 doesn’t work, even if it averages above $4,100.
Consulates want stability, not averages.
For the savings route, your balance must stay above $70,000 for all 12 consecutive months. If you had $65,000 in January and then deposited $20,000 in February, you still fail because January fell short. This catches people who sell property or receive inheritance right before applying.
You need the full 12-month history above the threshold.
The solution: Start tracking your statements 12 months before you plan to apply. If you’re building up savings, do it early. If you have irregular income, consider using the savings route instead.
Mistake 2: Wrong Type of Bank Statements
Consulates want official statements on bank letterhead. Screenshots from online banking don’t work. PDF downloads from your bank’s website sometimes work, but many consulates reject them.
The statement must show your name, account number, dates, and all transactions or monthly balances. Some people submit summary pages that only show the ending balance.
That’s not enough. Consulates want to see the full picture.
If your statements are in a language other than English or Spanish, you need certified translations (don’t use Google Translate).
The solution: Request official statements directly from your bank on letterhead. Do this several weeks before your consulate appointment because banks often take time to produce historical statements.
Mistake 3: Names Don’t Match Across Documents
Your name on your passport must match your name on your bank statements exactly. If your passport says “Robert James Smith” but your bank statements say “R.J. Smith” or “Bob Smith,” the consulate will reject your application.
Very common mistake.
This also applies to marriage certificates, birth certificates, and any other documents you submit. One letter different, one missing middle name, one hyphen in the wrong place. It all matters.
The solution: Check all your documents before applying. If your bank account uses a nickname or shortened version of your name, contact the bank and have them update it to match your passport. This can take weeks, so start early.
Mistake 4: Entering Mexico as a Tourist Instead of Canje
This is the most devastating mistake because it voids your entire visa approval.
When you arrive in Mexico with your residency visa sticker, the immigration officer must mark your FMM (entry form) as “canje” and give you 30 days. If they mark you as a tourist instead, your residency visa becomes invalid immediately.
You have to leave Mexico and restart the entire process from the consulate.
This happens more often than it should. Immigration officers at airports and land borders process hundreds of people daily. If you don’t explicitly tell them you’re there for residency and show them your visa sticker, they default to marking you as a tourist.
At airports with automated kiosks, never use the kiosk if you have a residency visa.
Go to a staffed immigration booth.
The solution: Before handing over your passport, open it to the page with your visa sticker. Say clearly (in Spanish if possible): “Tengo una visa de residente. Necesito canje.” (I have a residency visa. I need canje.) Don’t assume they’ll notice the sticker. Make it explicit.
Mistake 5: Missing the 30-Day Canje Deadline
You have 30 days from entry to begin your canje process at INM. If you miss this deadline, your visa becomes void.
You must leave Mexico and restart from the consulate.
“Begin” means you either attend an INM appointment or have one scheduled within 30 days. You don’t need the actual card in hand within 30 days, but you must initiate the process.
Many people arrive in Mexico thinking they’ll “figure it out” or they underestimate how hard it is to get INM appointments in popular expat towns.
By the time they realize appointments are booked 3 weeks out, they’ve already used up most of their 30 days.
The solution: Book your INM appointment the same day you arrive in Mexico, or even better, have an immigration facilitator book it for you before you arrive. Don’t wait.
Mistake 6: Incomplete Documentation at INM
When you attend your canje appointment at INM, you need specific documents. Missing even one item can mean your application gets rejected and you have to reschedule, eating into your timeline.
Required items usually include:
Passport with visa sticker
FMM marked as canje
Proof of Mexican address (utility bill or rental contract)
Payment receipt for residency card fee
Passport photos
And sometimes additional forms that vary by office.
Some INM offices are stricter than others. Some accept hotel confirmations as proof of address. Others require a formal rental contract or utility bill in your name.
If you’re staying with friends, some offices accept a letter from the homeowner. Others don’t.
The solution: Call or visit your local INM office before your appointment to confirm their specific document requirements. Better yet, hire an immigration facilitator who knows exactly what that office requires.
Mistake 7: Joint Accounts Without Proper Documentation
If you are applying using joint bank accounts (you and your spouse, for example), the rules get tricky.
If only one person is applying and the account is in both names, most consulates require you to show double the normal financial threshold. If both of you are applying together, you show the base amount plus the dependent add-on ($1,400).
Many people don’t realize this until the consulate appointment.
They show up with joint account statements thinking it will work for a single applicant. It doesn’t.
The solution: If applying solo, either use accounts in your name only or be prepared to meet the doubled requirement. If applying as a couple, bring your marriage certificate and make it clear you’re both applying.
Mistake 8: Cryptocurrency or Non-Qualifying Assets
Mexican consulates explicitly do not accept cryptocurrency as proof of financial solvency. They also don’t accept precious metals, employee stock options (that haven’t vested), or business assets.
Some people assume “I have $100,000 in Bitcoin” qualifies them. It doesn’t. Even if you can show the Bitcoin wallet balance, it’s not accepted.
The solution: Convert crypto or other non-qualifying assets into cash or traditional investment accounts at least 12 months before applying (for the savings route) or ensure you have qualifying income sources.
Mistake 9: Leaving Mexico During Canje
Once you enter Mexico to begin your canje process, you cannot leave the country until you have your residency card in hand. If you leave, your process is canceled and you must restart.
Some people don’t realize this.
They enter Mexico, start the canje process, then fly home for a family emergency or business meeting. When they try to re-enter Mexico, their visa is void.
There is a process to request permission to leave Mexico during canje (an exit/re-entry permit), but it’s complicated and not guaranteed.
The solution: Don’t enter Mexico for canje unless you can stay until the card is issued (typically 1-3 weeks after your appointment).
Mistake 10: Not Reading Consulate-Specific Requirements
Every Mexican consulate operates slightly differently. They all follow the same basic laws, but they interpret them differently and have different documentation standards.
Some consulates require 6 months of bank statements. Others require 12. Some accept IRA statements. Others don’t. Some allow out-of-area applications. Others refuse them.
People sometimes read too “generic” guides and assume all consulates work the same way.
Then they show up with documents that don’t meet their specific consulate’s requirements.
The solution: After reading this guide, visit your chosen consulate’s website and read their specific requirements page. Call or email them with questions. Confirm everything before your appointment.
Takeaway: Most application failures stem from documentation issues and missed deadlines. Start preparing early, verify requirements with your specific consulate, and don’t assume anything.
The process is straightforward if you follow the rules exactly, but unforgiving if you don’t.
#6 What Happens After Approval and How to Maintain Your Status
You have your residency card (congrats!).
Now you need to manage it correctly to avoid losing your status.
Understanding Your First Card
Your first temporary residency card is always valid for one year, regardless of what you qualified for financially. The expiration date is based on the date you entered Mexico for canje, minus one day.
Example: You entered Mexico on June 10, 2024. Your card expires June 9, 2025.
Mexican dates are written day/month/year. If your card shows 9/6/25, it expires on June 9, 2025, not September 6.
Renewal Requirements
You must renew your card before it expires if you want to stay in Mexico legally. You can start the renewal process up to 30 days before expiration.
For your second renewal and beyond, you can request 1, 2, or 3-year extensions. The maximum total time on temporary residency is 4 years. After 4 years, you either switch to permanent residency or leave Mexico.
Renewal happens at the same INM office where you did your original canje.
You need to book an appointment through the online system (same process as your initial canje).
Renewal costs vary by length: roughly 5,500 pesos for 1 year, 8,300 for 2 years, 10,500 for 3 years.
What If You’re Outside Mexico When Your Card Expires
If your card expires while you’re traveling outside Mexico, you have 55 days from the expiration date to return and renew.
When you re-enter Mexico, you must request an “exit and re-entry stamp” from the immigration officer.
Then you have 5 days after re-entry to submit your renewal application at INM.
Critical: Make sure the immigration officer doesn’t mark you as a tourist when you re-enter. Show them your expired residency card and explain you’re returning to renew.
Work Authorization
Temporary residency does not automatically grant work permission.
If you want to work legally in Mexico (including remote work for Mexican clients, renting property on Airbnb, or any income-generating activity in Mexico), you must request a work permit from INM.
This is a separate process (and not covered in this guide). You apply at INM with documentation about your intended work. The permit gets added to your residency card.
Working without authorization can result in deportation and permanent bars from returning to Mexico.
Permanent Residency After 4 Years
After holding temporary residency for 4 consecutive years, you become eligible to apply for permanent residency. This application happens within Mexico at your local INM office.
The advantage: You don’t need to reprove financial solvency. Your 4 years of temporary residency qualify you automatically.
Permanent residency cards never expire (for adults). You can live in Mexico indefinitely, work without special permission, and travel freely in and out of the country.
Traveling In and Out of Mexico
You can leave and re-enter Mexico as often as you want while your residency card is valid.
There’s no minimum number of days you must spend in Mexico each year to maintain temporary residency status.
However, if you plan to eventually apply for Mexican citizenship, you’ll need to prove physical presence in Mexico for at least 18 months out of the 2 years before applying.
Maintaining Your Address Registration
If you move to a different address within Mexico, you’re required to notify INM within 90 days. This is often ignored, but technically required.
If you move to a different state or city, you may need to transfer your residency file to the new local INM office.
Losing Your Card
If you lose your residency card while in Mexico, report it to INM immediately and apply for a replacement. Bring a police report if possible.
If you lose it while outside Mexico, go to the nearest Mexican consulate. They can issue temporary documentation to allow you to re-enter. Once back in Mexico, apply for a replacement at INM.
Never carry a photocopy of your residency card as your primary ID. Color copies of government-issued Mexican IDs are considered fraud.
Key Dates to Remember
Check your card expiration date as soon as you receive it.
Set a reminder 60 days before expiration to start monitoring INM appointment availability
Start your renewal process 30 days before expiration
If traveling, ensure you’ll be back in Mexico in time to renew.
Takeaway: Temporary residency requires active management. Miss your renewal deadline and you lose your status. Track your dates, understand the renewal process, and plan travel around your card’s validity.
The system is strict about deadlines but straightforward if you stay organized.
Your Mexico Residency Checklist
Phew, that was a lot!
You just read through a comprehensive guide on moving to Mexico. Now comes the fun part: turning all that information into actual progress.
I have created a downloadable PDF checklist that organizes every step into clear categories with timeline guidance.
Print it, save it, check boxes as you go.
This checklist is available to paid subscribers.


